Happy Gut Chia Seed Crackers
- Adam
- Oct 11, 2021
- 3 min read
(Printable recipe link below)

Store bought crackers are too often packed with sodium, low in fibre and made with refined grains. Even though they come in a plethora of flavours, I've always thought that crackers should be more of a vehicle for nutritious toppings and dips. Seeds & nuts are a great way to add protein and omega-3 fats to your snacks. It's the Chia seeds that star in this recipe. They are around 18-24% protein, some of the highest of any plant sources.
Chia seeds are also extremely high in both insoluble and soluble fibre. It's the latter that is a nutritious prebiotic that has been shown to increase beneficial bacteria in the gut such as Bifidobacterium and Lactobacillus. This is great news for your overall gut health.
The sesame, pumpkin and sunflower seeds are all high in monounsaturated and polyunsaturated fats which can reduce cholesterol and protect your heart.
You can play around with this recipe quite a bit. Add different herbs such as rosemary, thyme or spices like turmeric & cumin for a Middle Eastern twist. If you like it spicy, add some chilli flakes. I've seen recipes with soy sauce, but I find that overpowers the crackers too much and adds more sodium than you need.
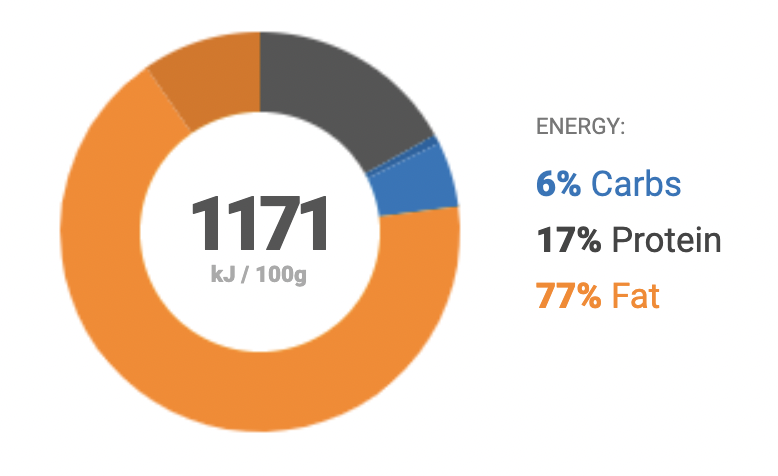
Being nut free, you can easily add these to a school lunch box, and being gluten free, they're perfect for anyone with gluten allergies. They also low carb which leaves plenty of room for adding your favourite nutrient dense toppings or dips. This recipe will make around 50 crackers, but you may choose to cut them smaller or larger. I don't recommend making them too small or thin as they will tend to crumble. However you serve them up, these crackers a gut loving winner!
Prep Time: 10 mins Cooking Time: 75 mins

Method:
Preheat oven to 150C and line two trays with baking paper.
Combine all ingredients in a bowl.
Mix well with water and ensure that all dry ingredients are moist.
Leave soak for around 5 mins until the Chia seeds have absorbed all of the water. When you lift some of the mix on a spoon there should be no water left in the bowl.
Divide between the two trays. Using a second sheet of baking paper laid on top, use fingers to press out cracker mix to a thickness of around 2-3mm. Don't make them too thin or they will just crumble when cutting them later.
Remove top sheet of baking paper and bake in preheated oven for 25 mins.
Take tray out of oven and using one or two egg flips, flip the cracker patty over. Return to oven and bake for a further 20-25 mins.
Keep an eye on them towards the end of the cooking time to ensure the edges aren't burning.
This part is important to get a crispy cracker.... Turn oven off, and place cracker patties onto a cooling rack. Then return to oven with the door slightly ajar for 15-20 mins. This helps the underside of the cracker dry out completely.
Once cooled and using a large sharp knife, cut into 3cm squares (or really any size that you like). At this size, you should get around 50 crackers.
Keep in an air tight container for up to 1 month. If the crackers begin to soften, spread onto a baking tray and put into an oven at 120C for 5-10 mins.
Enjoy with your favourite dip!
Click here for printable recipe


Comments